


As the laminate technology evolves and the installation tools and methods become easier, there are more and more do-it-yourself (DIY) enthusiasts who want to take on the task of installing laminate themselves. Either for economical reasons or out of shear challenge of doing it yourself – the number of amateur installers is growing rapidly. There are however some things you have to know to avoid common installation mistakes and unnecessary financial cost.
We hope that the answers below will serve as a good laminate installation guide.
- 1Can I start the installation right away?
Your new flooring material needs to acclimatise to your home for at least 2 days before you install it. The sub floor needs to be totally dry. It will need to be thoroughly cleaned and not have any debris or dust on it. Leveling and flatness needs to be checked. As a rule of thumb any raised sections of more than 3 mm need to be levelled. It is better the sub floor unevenness deviations will not exceed 1/8″ in any 8 ft long area especially for thinner laminate like 8 mm. The cracks will need to be filled and sealed. Duct tape can be used to cover very small cracks but if the crack has a ridge, it will need to be levelled.
The easiest and quickest way to do this is t use liquid levelling compound like a latex screed. Make sure the temperature of the room is between 18 and 26 degrees and it should stay in that range for a day after the floor is installed. The humidity needs to be between 40 and 50 percent for optimum conditions. This is because the way wood reacts to heat and humidity by expanding and contracting.
Measure the room to determine the number of panels needed. If the last row is going to be less than 60 mm, trim the first row lengthwise. Laminate flooring is organic, that is why it will be subject to expansion and shrinkage. For this reason, an expansion gap at least 6 mm will need to be left between the flooring and the walls. - 2Where can laminate wood flooring be installed?
It can be installed in any inside area (down, up) and on any type of subfloor but not in wet areas such as such as bathrooms, washrooms.
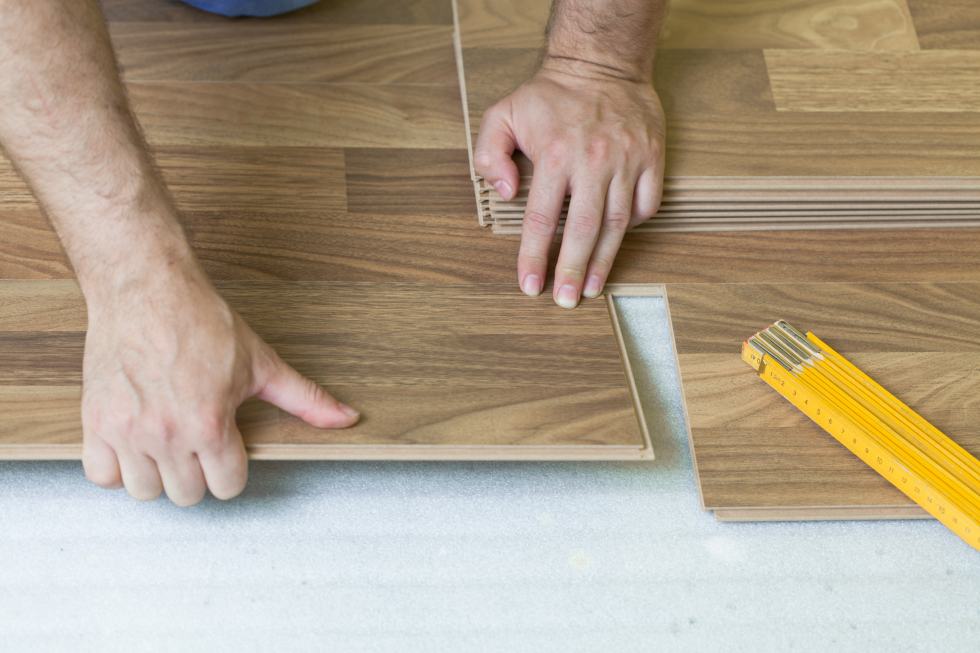
- 3How to install laminate flooring?
It is easiest type of flooring to be installed because the locking system allows the planks to be tapped together while laying flat side by side. This really makes it easier when installing under door jambs. The starting wall should be as straight as possible.
If the opposite walls are not parallel and or room shape resembles a rhomb, the unevenness should be proportionally divided between 2 walls during floor installation. Since laminate flooring like hardwood is subject to expansion caused by seasonal room temperatures and humidity level changes it is necessary at least 6 mm gap left between walls and floors around the perimeter.
Remember your floor will be shrunk in winter time when the heating is turned on and expanded in summer time when room humidity exceed because of open windows. - 4Is there any design recommendation during installation?
The distance between joints from one row to the next for the remainder of the installation must be 6 inches or greater. Inspect boards for defects before installing. It is important to keep staggering the planks in laminate flooring installation.
Some installers consider under staggering the following design: the first row should be started with a full plank, the second row with a 2/3 plank and the third row with a 1/3 plank. Another opinion determines under staggering the following way of installation: first row starts with a full plank, second row with a 1/4 or 1/3 planks, the third row 3/4 or 1/4 plank and so on.The matching line in short sides of installed planks should be very rare – many designers think the homeowner will be tired of observing reputedly matching lines especially over every 2 rows.
- 5Which direction of flooring planks are preferable?
There are different recommendations about the floor running direction. It is usually recommended that the planks be installed parallel to the sunlight coming into the room. Most of installers prefer lay floor in direction of long part of room.
As though many designers can advise to install the floor in short way to make the narrow part of room wider visible. According another rule the floors direction has to lead you inside of home but not cross your steps in your way inside room. - 6How replace the damaged plank in the middle of living room?
The easiest way to remove the clicked floor from the nearest wall and reassemble. It is possible to replace the damaged planks one by one that requires more experience. Our professional installers can help you to solve any issue related with single wood planks replacements
- 7Why high quality underlayment is important?
The proper sound and moisture proof underlayment will protect your floor from moisture, increase underfoot warmth, absorb the noisiness of hard laminate surfaces.
It is highly recommended to get Strata approved IIC 73, STC 72 grade underlayment. In addition to foam type underlay the market offer high quality natural cork-based and rubber-based Durason underlayment.